

Toronto Handyman Drywall Guide
How to Install and Finish Drywall
A practical step-by-step guide to installing drywall, choosing the correct screws, cutting panels, taping joints, applying joint compound, sanding, and preparing drywall for primer.
NEED PROFESSIONAL HELP?Drywall Installation Basics
Installing drywall is relatively straightforward when the framing has been prepared correctly. The most important part is making sure every drywall panel is properly supported by the wall studs and that all joints are prepared correctly for taping and finishing.
This guide explains the basic process for standard residential drywall installation using wood or light-gauge metal framing.
Understanding Drywall Size and Stud Layout
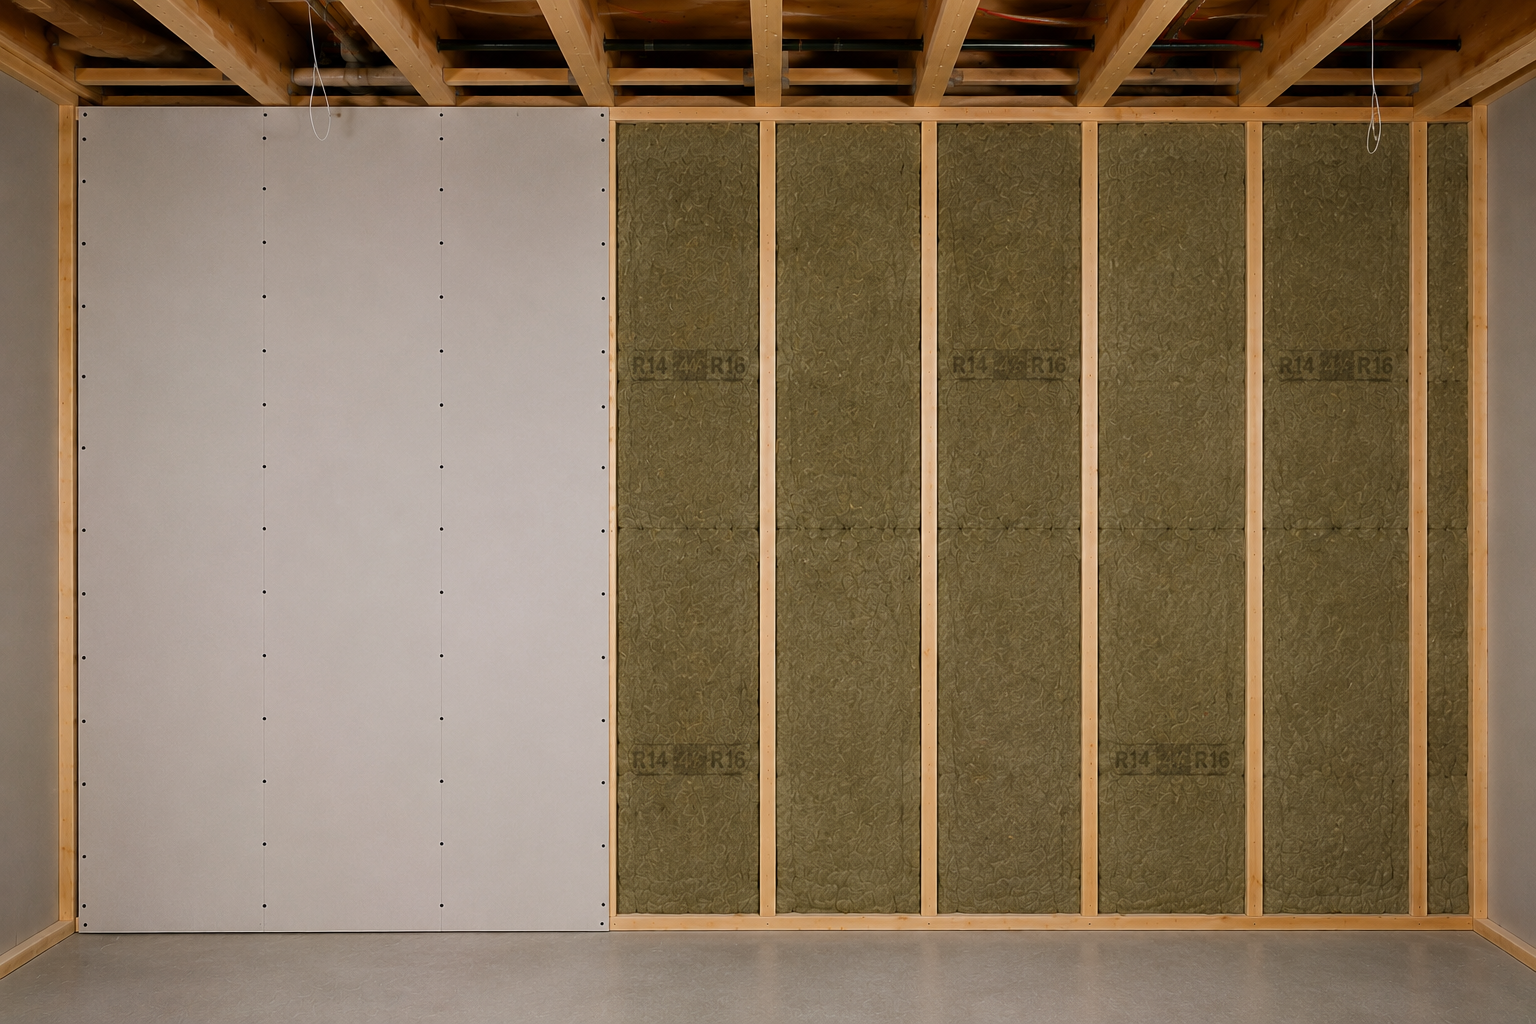
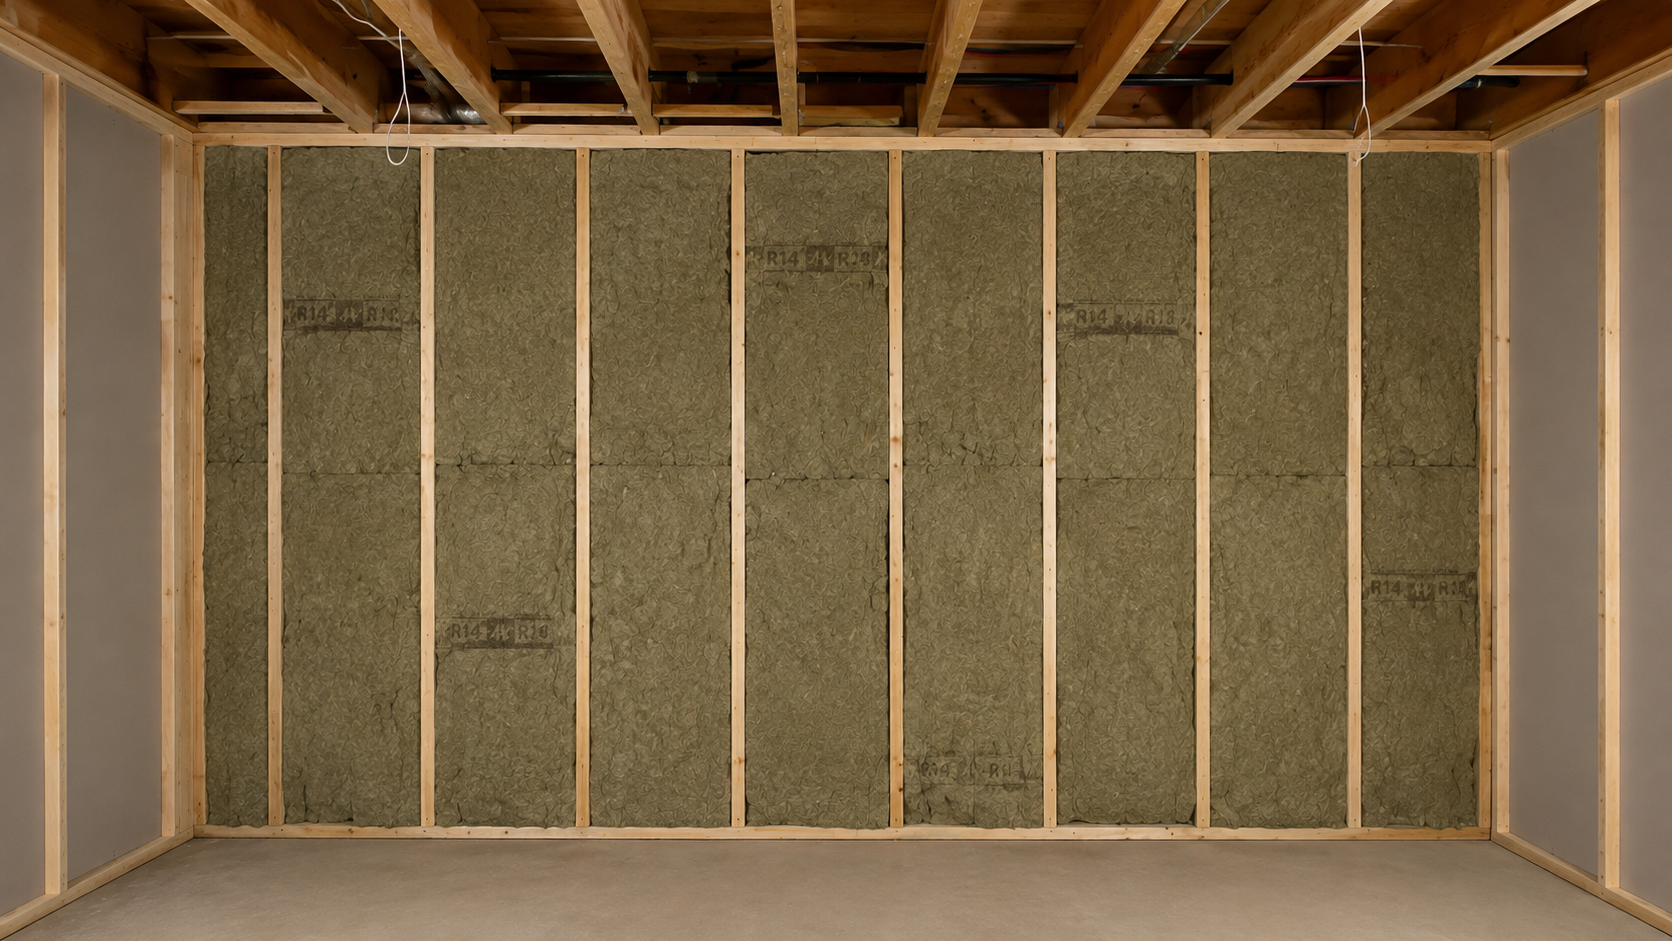
With studs spaced 16 inches on centre, a 48-inch-wide drywall sheet spans three 16-inch framing bays, with its two outside edges supported on stud centre lines.
When wall framing is built with studs spaced 16 inches on centre, the 48-inch width of a drywall sheet follows the framing layout.
With properly installed framing, a 48-inch-wide drywall sheet spans four stud positions from one edge to the other.
Choose the Correct Drywall Screws
Drywall should be installed using proper drywall screws. The type of screw depends on whether the wall is framed with wood or metal studs.
Wood Studs
For wooden framing, use coarse-thread drywall screws.
For standard 1/2-inch drywall, 1-1/4-inch drywall screws are commonly used.
The coarse thread provides good grip in wooden framing.
View Coarse-Thread Drywall Screws →Metal Studs
For light-gauge metal framing, use fine-thread drywall screws.
For standard 1/2-inch drywall, 1-1/4-inch fine-thread drywall screws are commonly used.
Fine threads are designed to engage properly with metal framing.
View Fine-Thread Drywall Screws →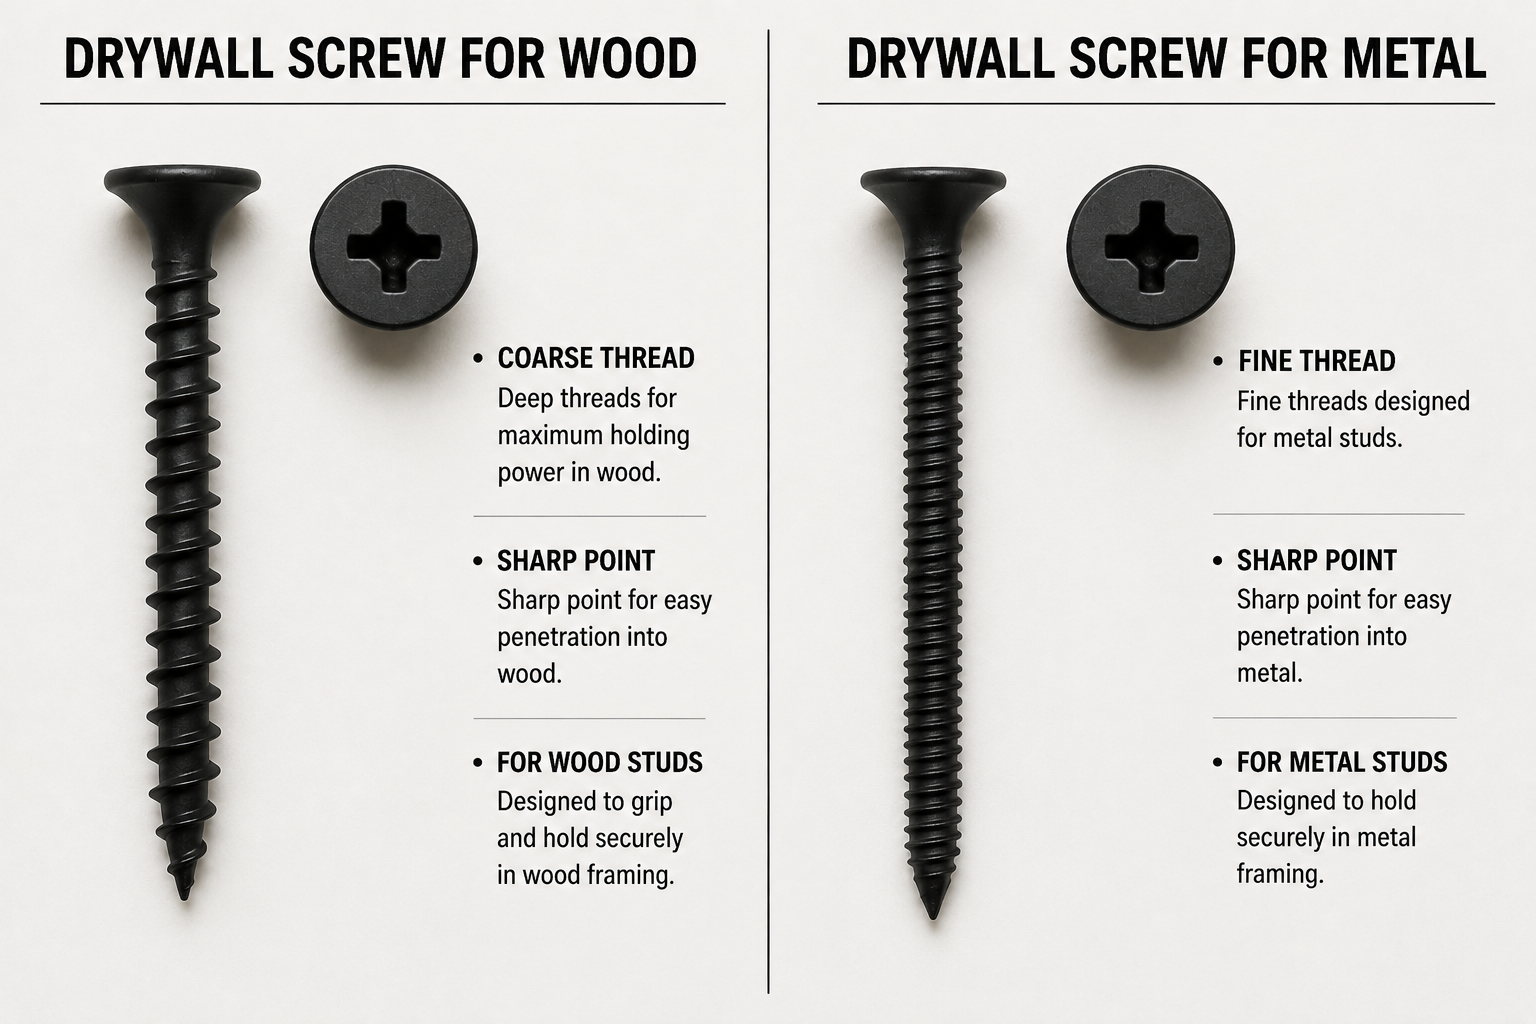
Set the Screws to the Correct Depth
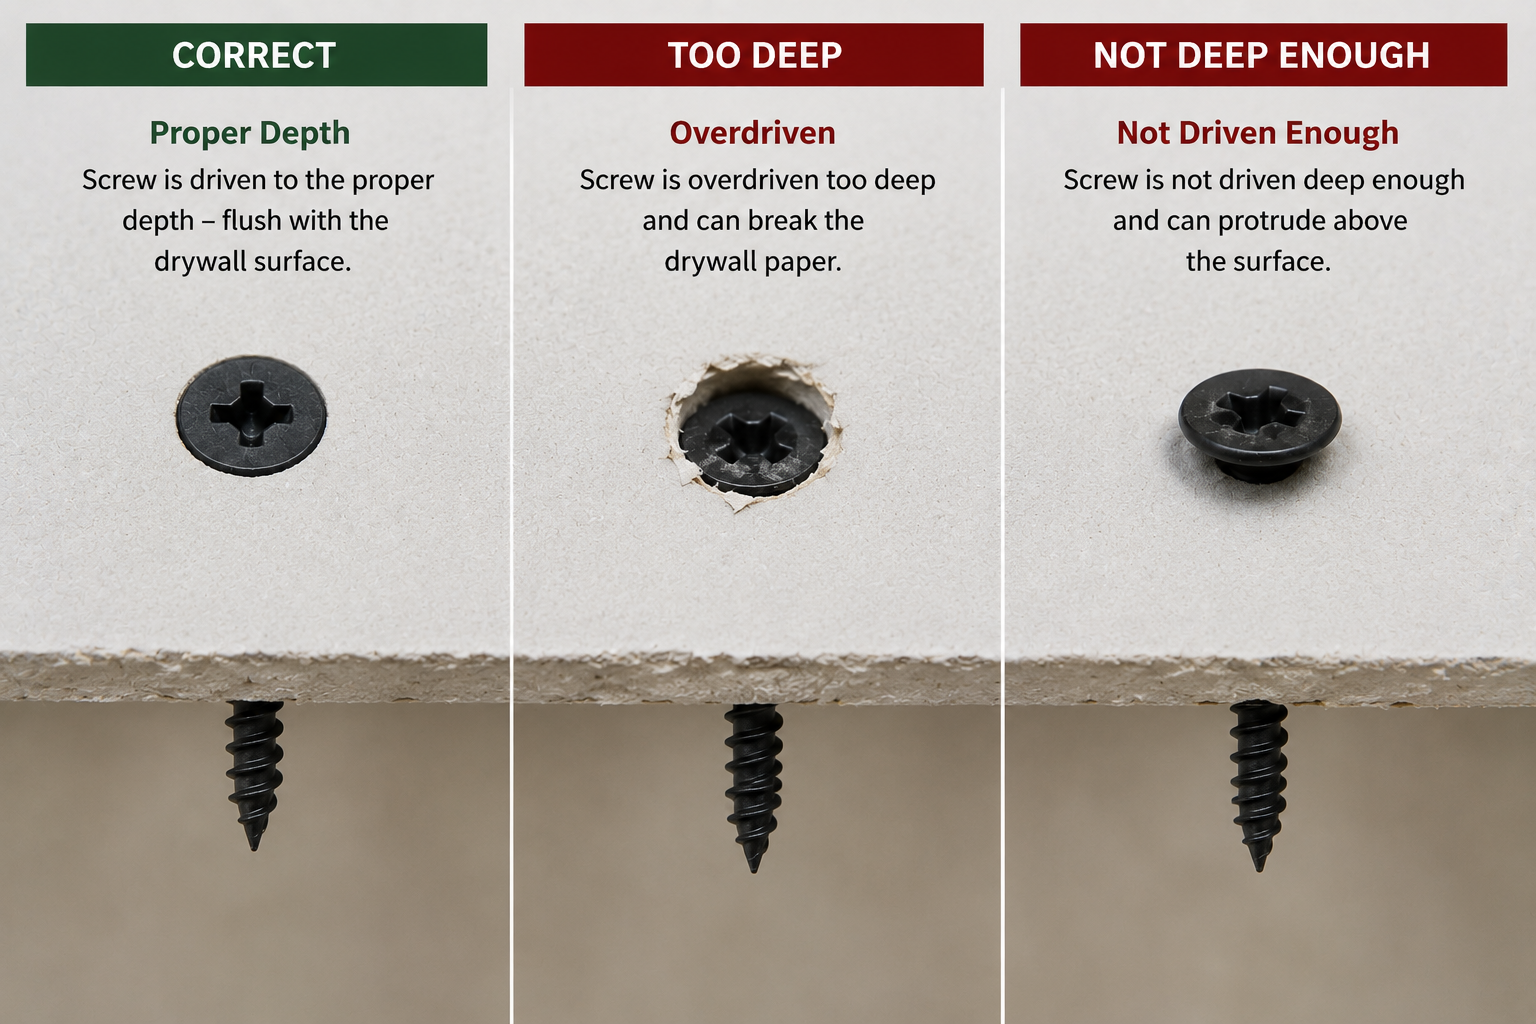
The drywall screw head should sit slightly below the surface of the drywall paper. This creates a small depression that can later be filled with joint compound.
However, the screw should not be driven so deeply that it tears through the drywall face paper.
Measuring and Cutting Drywall
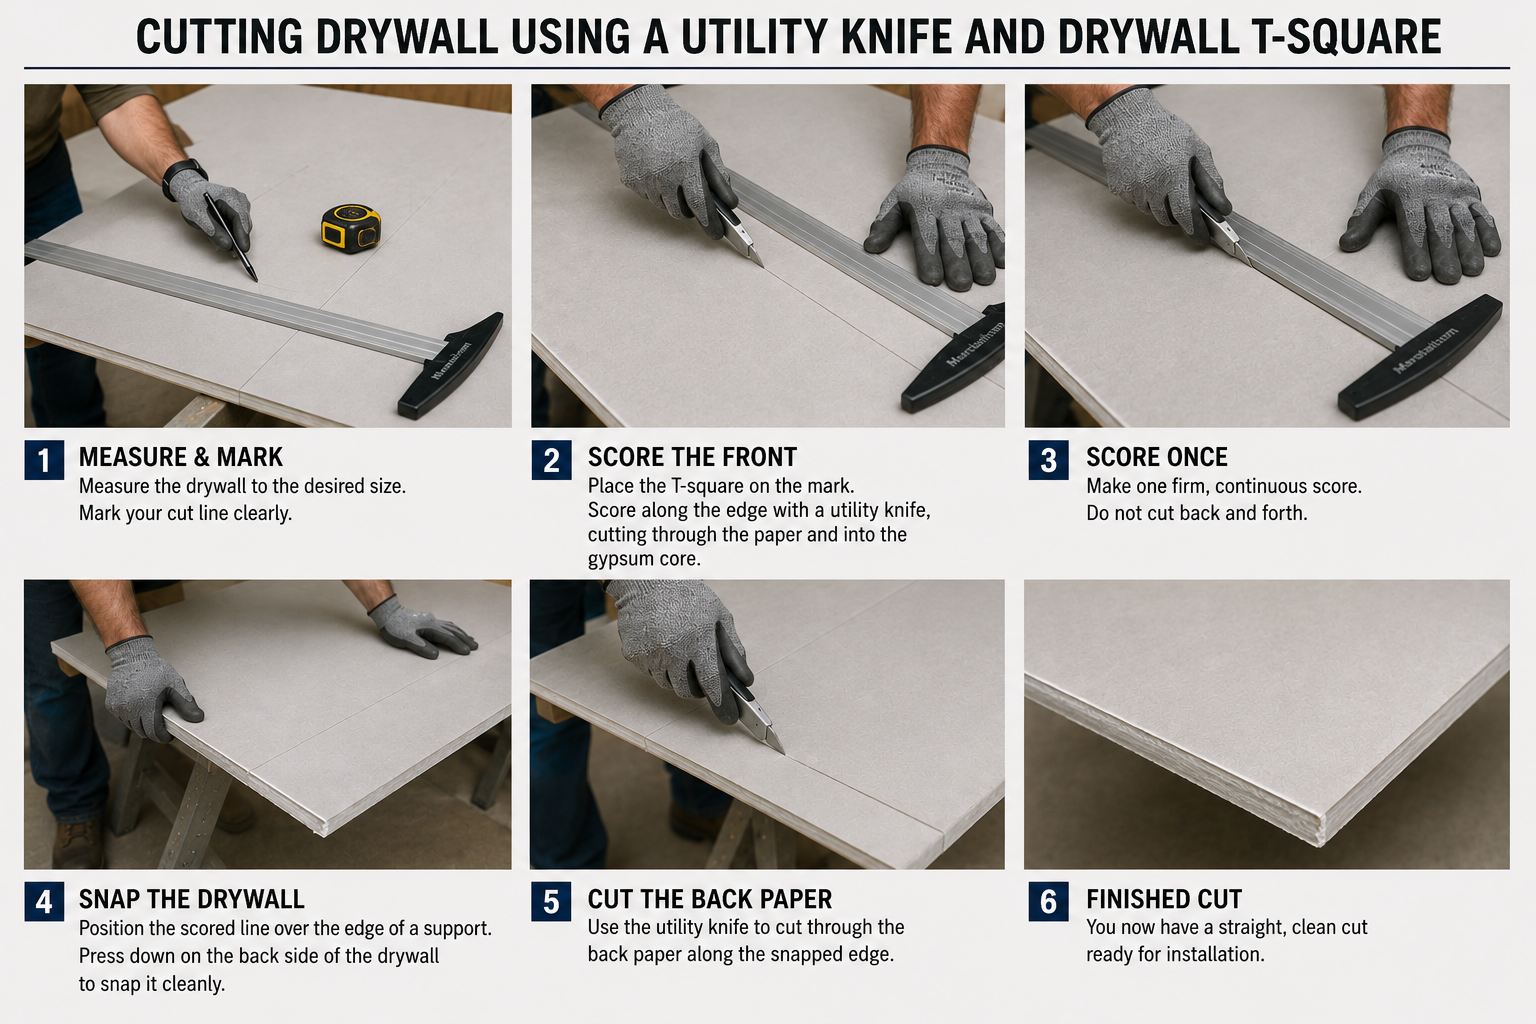
Straight drywall cuts can normally be made with a standard utility knife.
- Measure the required size and mark the drywall.
- Place a long straight edge along the mark. A long level can be used, but a 48-inch drywall T-square makes the process easier.
- Run the utility knife along the straight edge and score the drywall face paper.
- Snap the drywall panel along the scored line.
- Cut the remaining paper on the back side with the utility knife.
Position the Drywall Sheets Correctly
Whenever possible, plan the drywall layout before fastening the first panel.
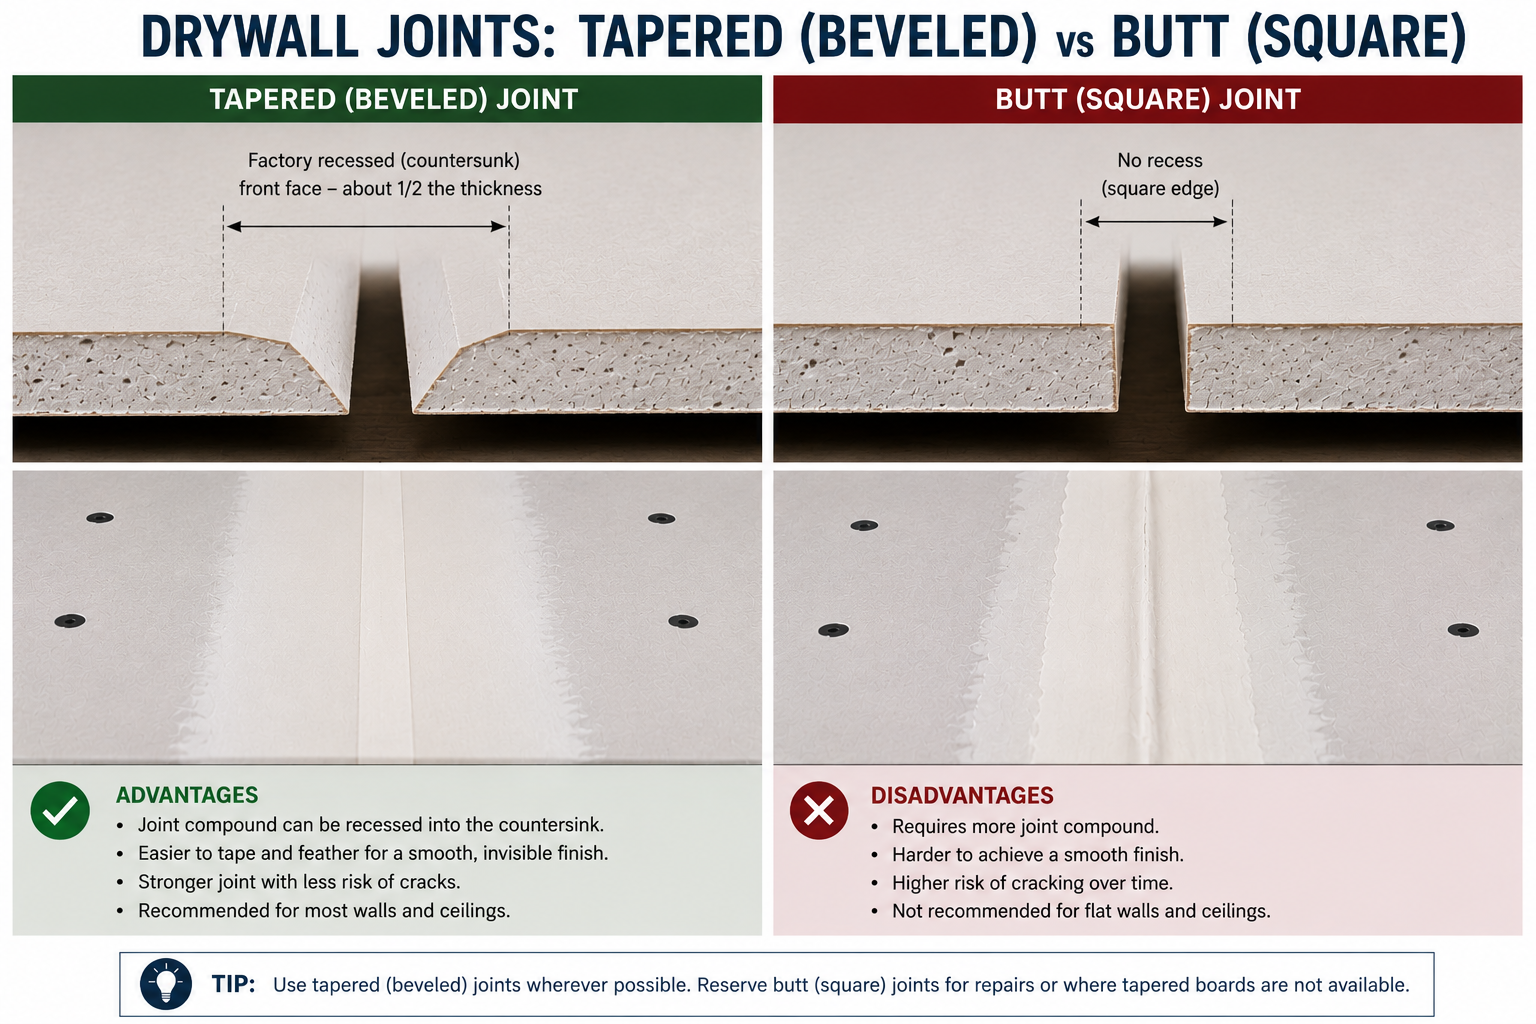
Factory tapered edges should preferably meet factory tapered edges.
These edges are manufactured slightly thinner to create space for drywall tape and joint compound. This helps produce a flatter finished joint.
A cut edge meeting another cut edge creates what is commonly called a butt joint. Butt joints can be finished properly, but because there is no factory recess, the joint compound usually needs to be feathered over a wider area.
Paper Tape vs. Fiberglass Mesh Tape
Once the drywall is installed, the joints between the panels need to be reinforced before finishing.
Two common options are paper drywall tape and fiberglass mesh tape.
Both reinforce drywall joints, but they are installed differently and each has advantages depending on the application.
Paper Drywall Tape
Paper tape is the traditional drywall finishing method and is widely used by professional drywall installers.
Paper tape is not normally self-adhesive. It must be embedded into wet joint compound.
Advantages
- Thin finished joint
- Strong when properly embedded
- Excellent for inside corners
- Factory centre crease makes folding easier
Things to Watch For
If there is not enough compound underneath the tape, or if air becomes trapped during installation, bubbles can appear.
View Paper Drywall Tape →Fiberglass Mesh Tape
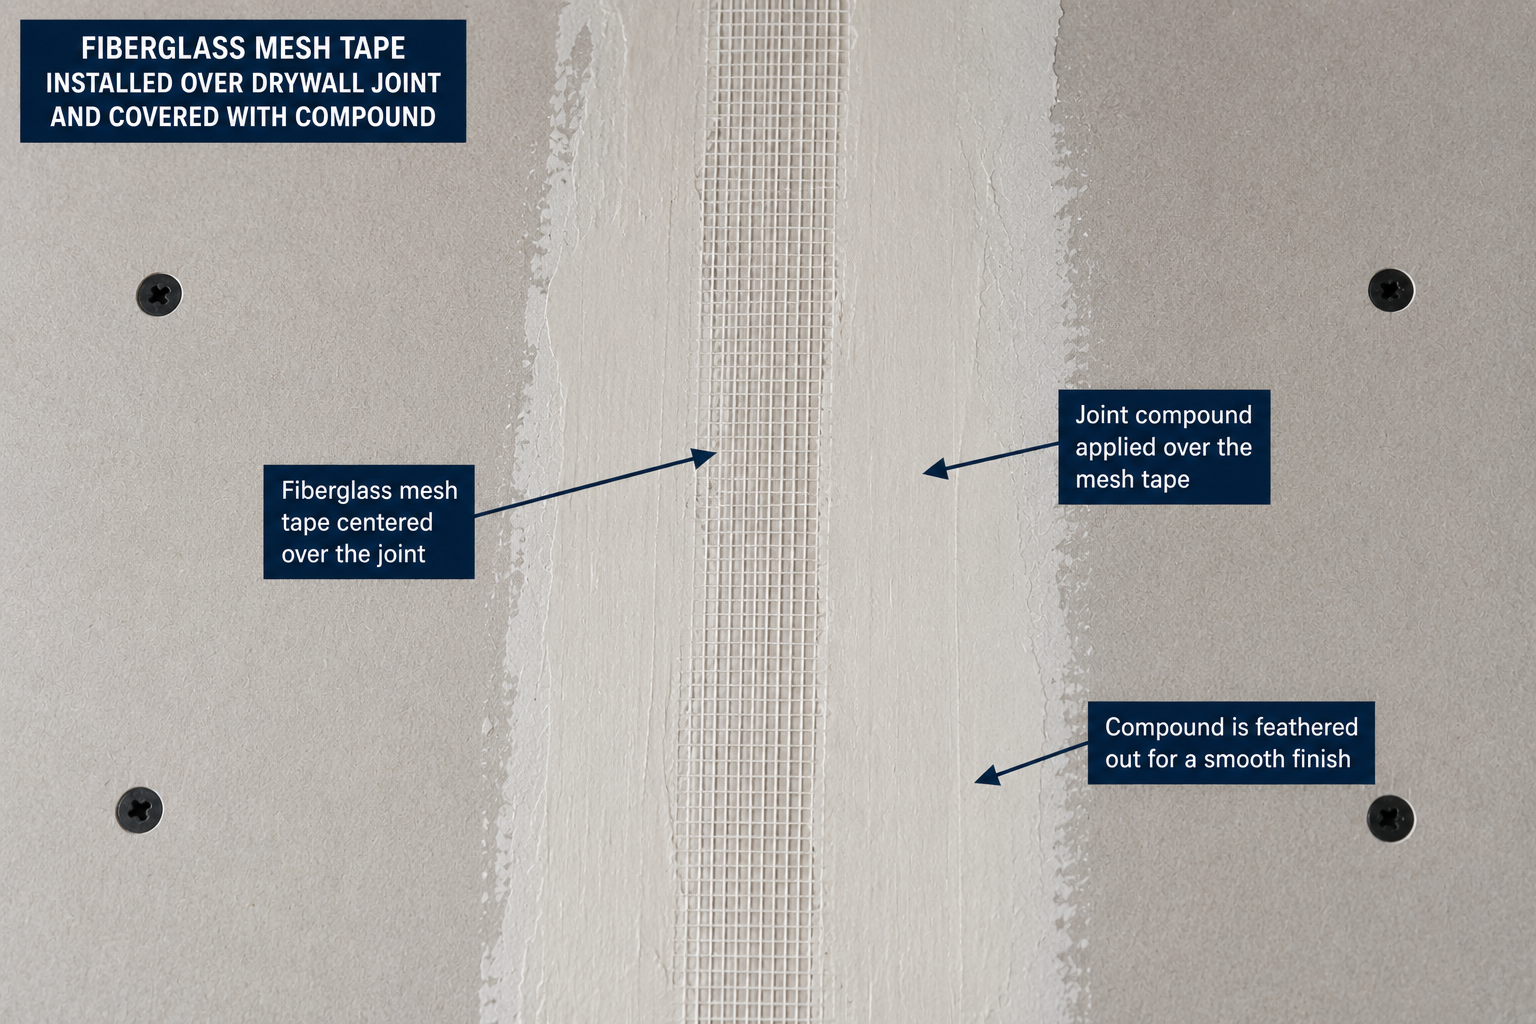
Fiberglass mesh tape has an open mesh construction and is commonly supplied with a self-adhesive backing.
This allows the tape to be positioned directly over the drywall joint before applying compound.
Advantages
- Easy to position
- Self-adhesive
- Convenient for many repairs and patches
- No paper-tape-style air bubbles underneath
Things to Watch For
Mesh tape is thicker than paper tape and the selected joint compound must be compatible with the mesh tape being used.
View Fiberglass Mesh Tape →How to Apply Paper Drywall Tape
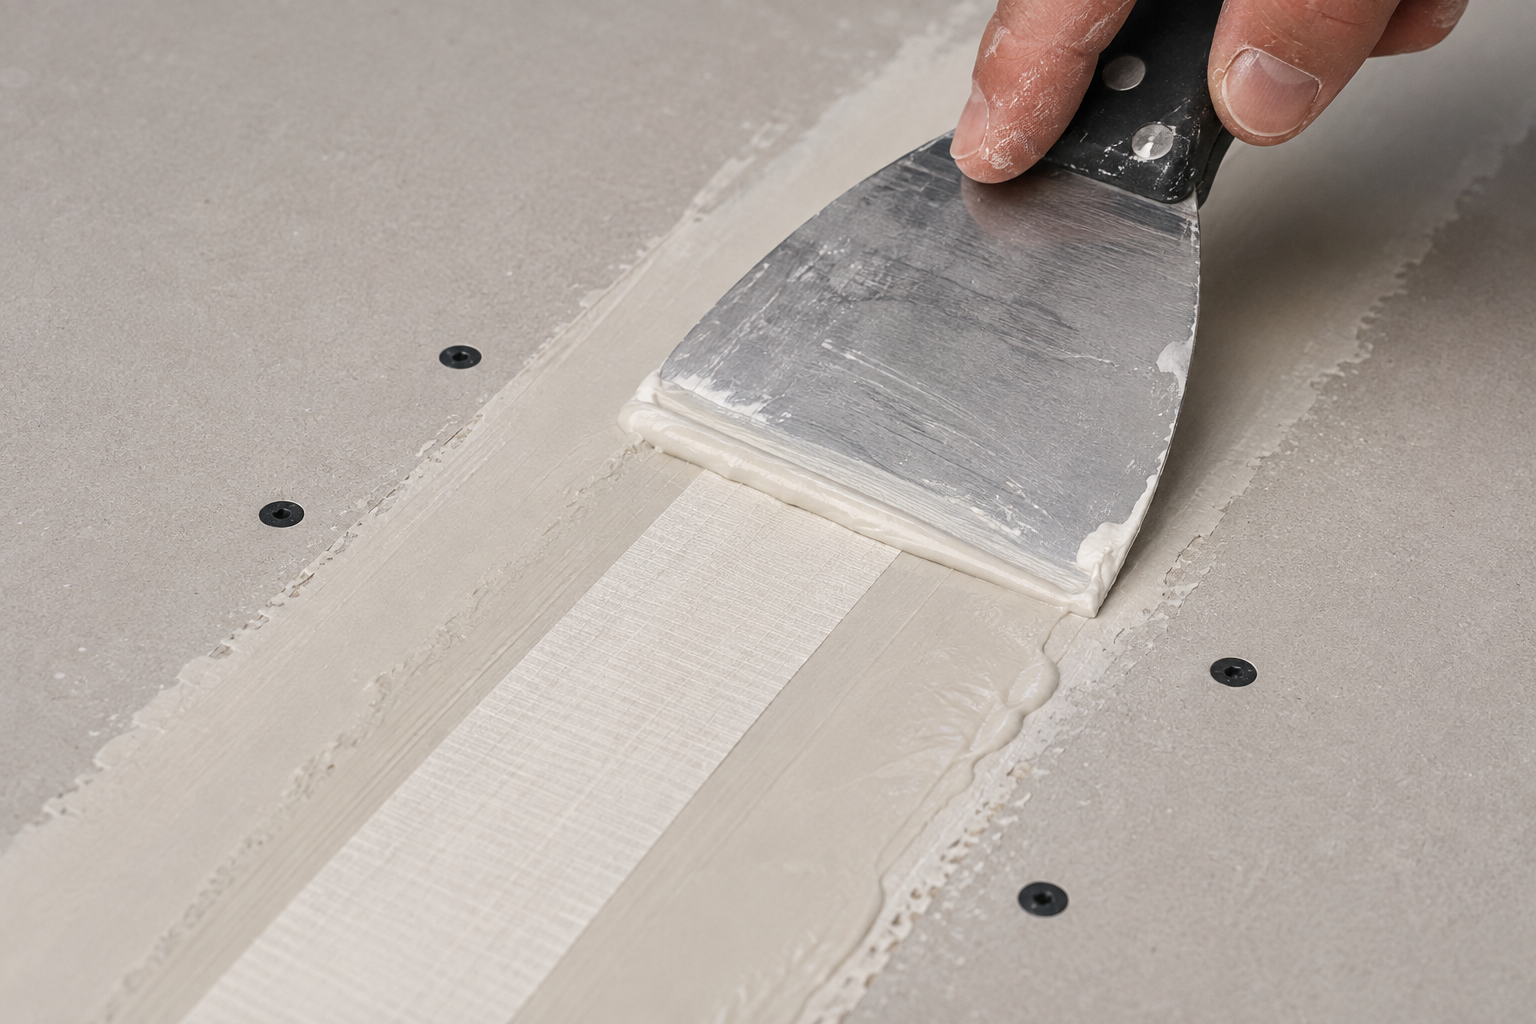
- Inspect and clean the drywall joint.
- Apply an even layer of joint compound over the joint using a taping knife.
- Centre the paper tape over the joint while the compound is still wet.
- Starting near the centre, run the drywall knife along the tape toward the ends.
- Remove excess compound and trapped air while leaving enough compound underneath the tape to create a proper bond.
- Make sure the tape is flat without bubbles, wrinkles or loose edges.
Using Paper Tape on Inside Corners
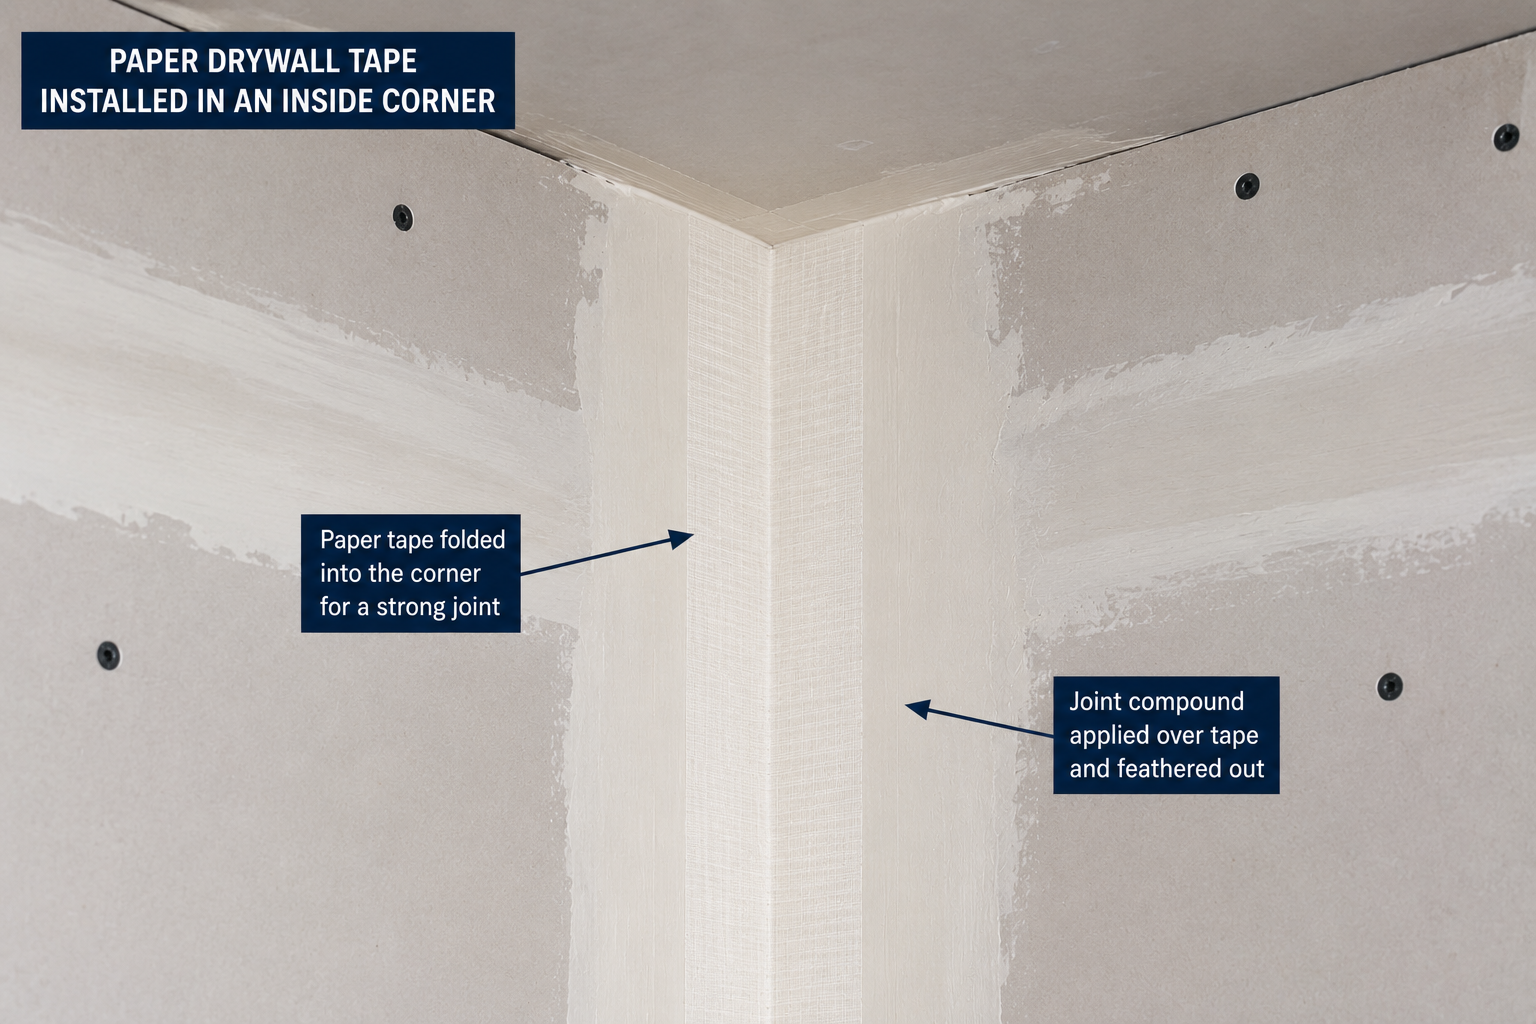
Paper tape is particularly useful for inside corners because most drywall paper tape has a factory crease running through the centre.
Apply joint compound to both sides of the inside corner, fold the paper tape along its centre crease, and carefully position it into the corner.
Embed the tape into the compound while removing excess compound and trapped air.
How to Apply Fiberglass Mesh Tape
- Make sure the drywall joint is clean and reasonably free from dust.
- Centre the self-adhesive mesh tape directly over the joint.
- Press the tape onto the drywall and keep it straight.
- Apply the appropriate joint compound over the mesh.
- Press the compound through the openings in the mesh so the joint underneath is completely filled.
- Smooth the compound and feather the edges into the surrounding drywall.
Tools for Applying Joint Compound
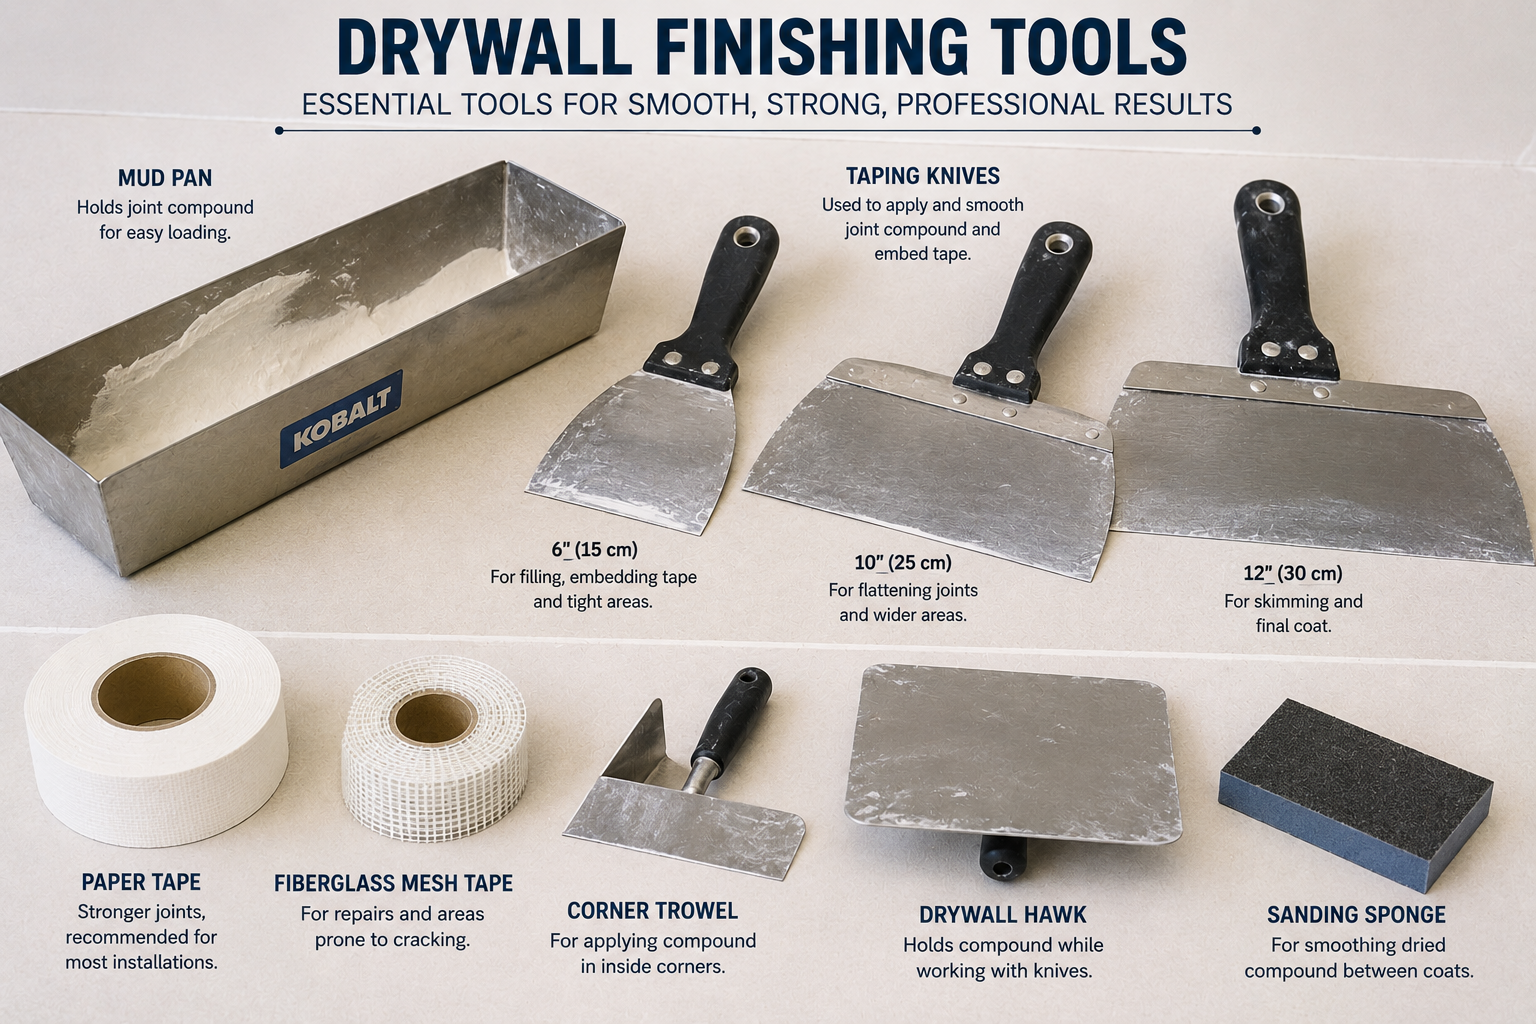
For basic drywall finishing, it is useful to have at least two drywall knives: a smaller taping knife and a larger finishing knife.
A drywall mud pan makes it easier to hold and work with joint compound while moving around the wall.
Choosing Joint Compound
Ready-mixed all-purpose joint compound is convenient because it comes prepared for use and can be used for many common drywall finishing applications.
Setting-type compounds are supplied as a powder and mixed with water. They harden chemically and are available with different approximate setting times.
Cover the Drywall Screw Heads
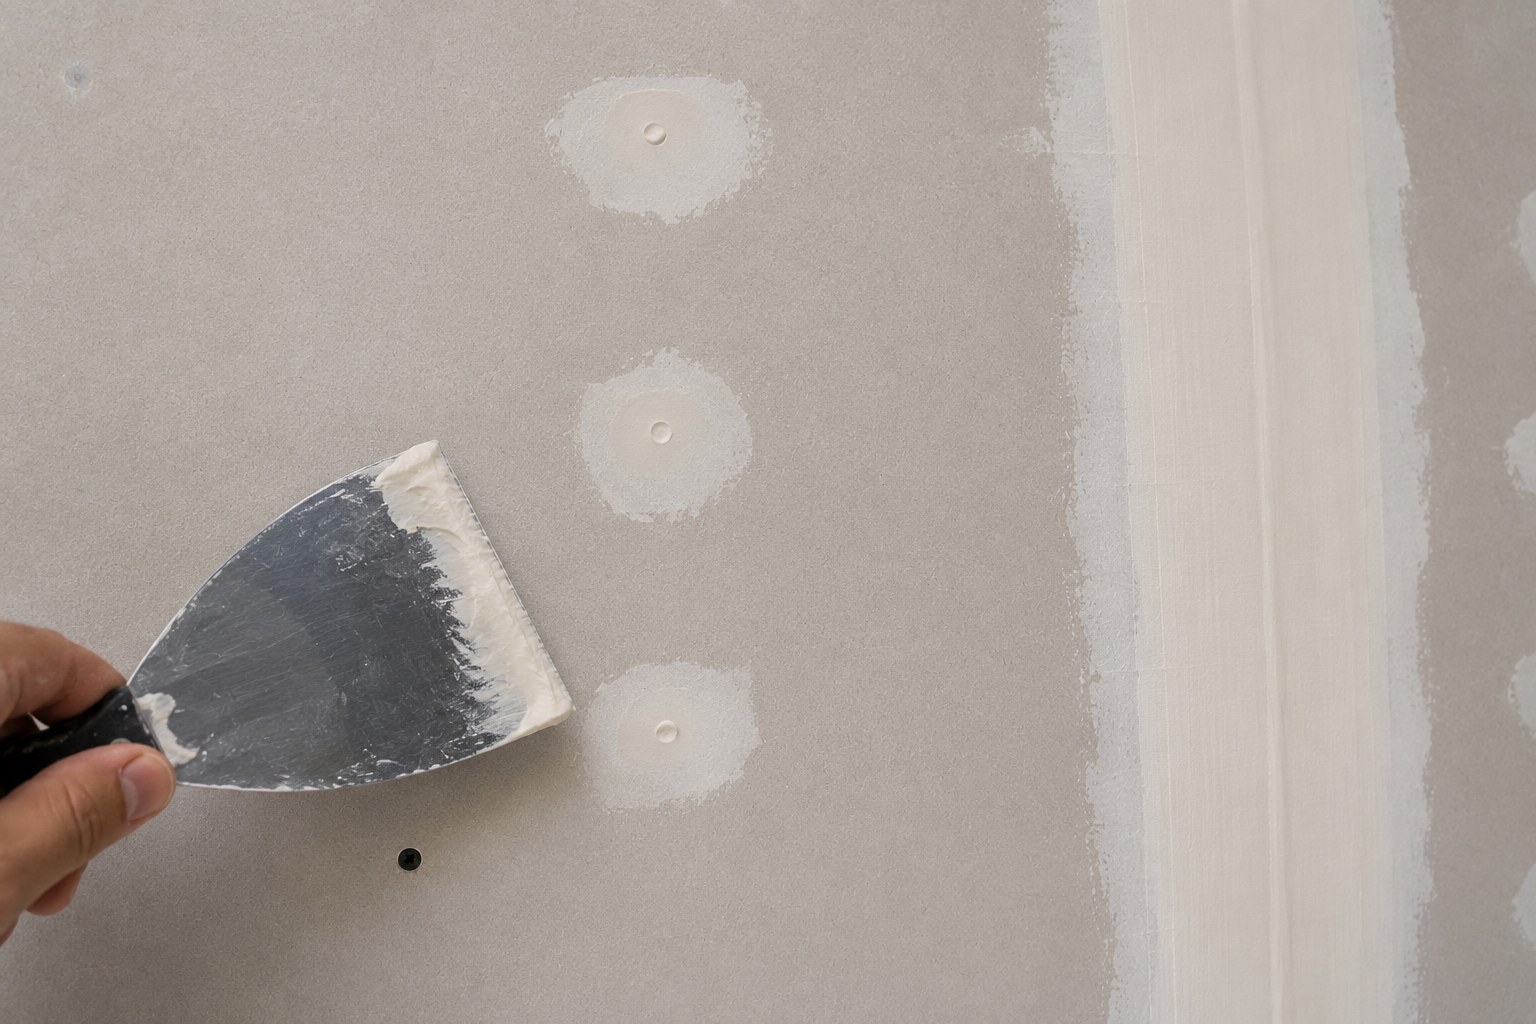
Every drywall screw head must be covered with joint compound.
Take a small amount of compound on the smaller drywall knife and pull it firmly across the screw depression.
Completely fill the depression while leaving as little unnecessary compound around the screw as possible.
The Three-Coat Drywall Finishing Process
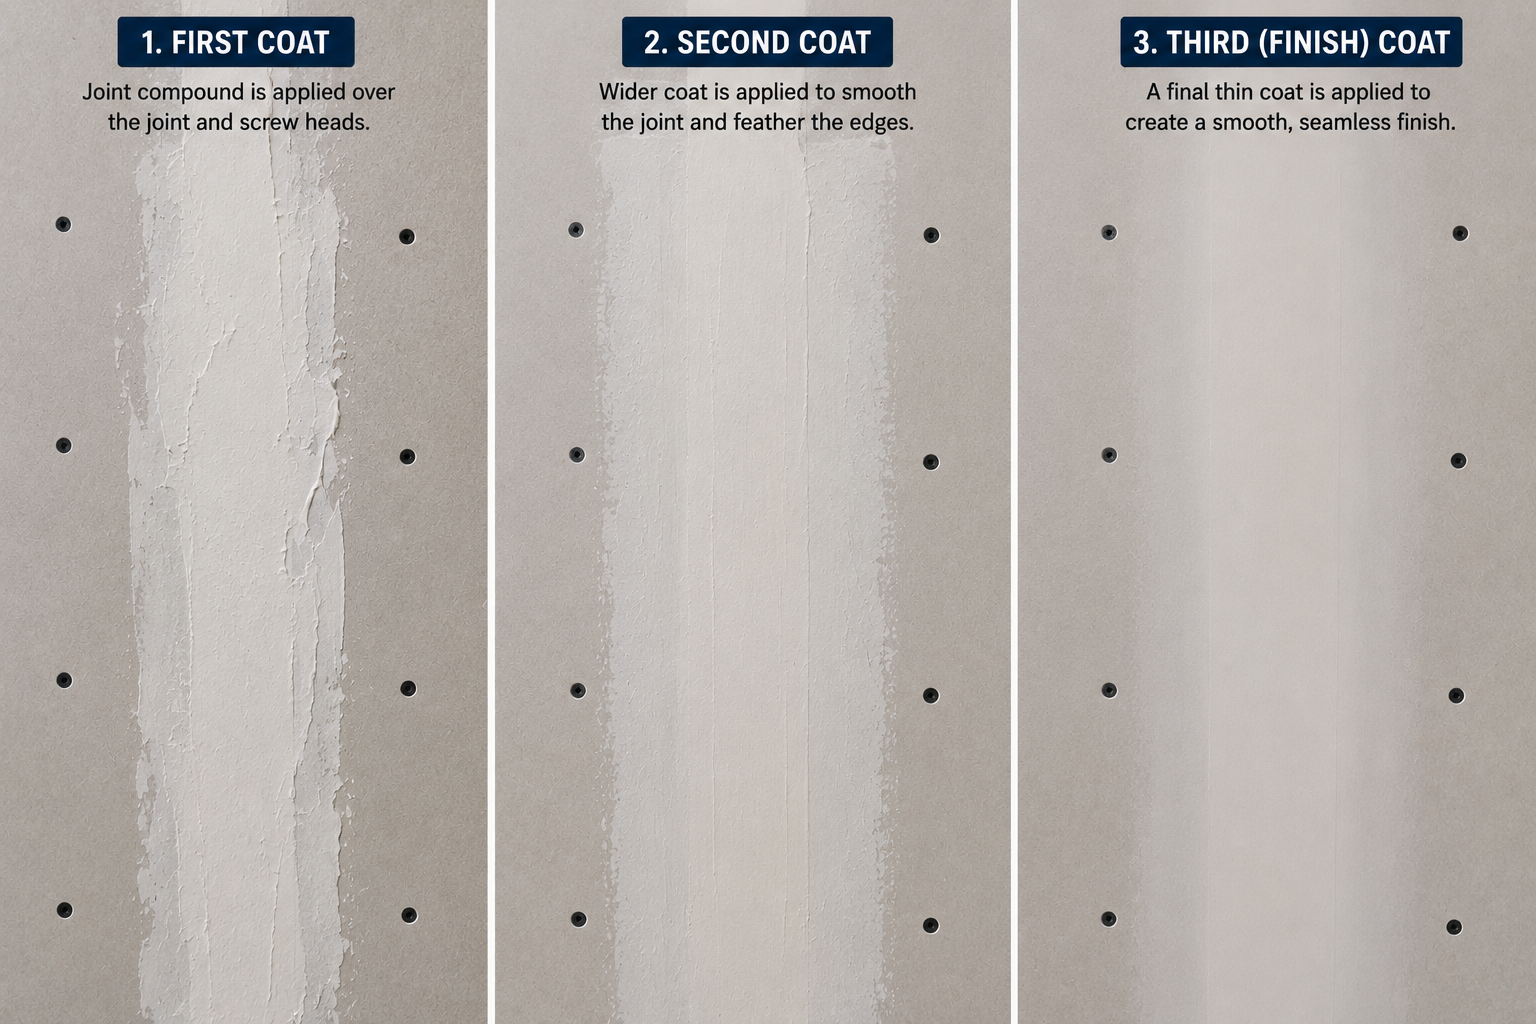
First Coat
The first coat embeds or covers the joint tape and fills the screw depressions. Keep the application controlled and avoid unnecessary buildup.
Second Coat
Once the first coat has completely dried or set as required, remove obvious high spots and apply a wider second coat.
Extend the compound farther beyond both sides of the original joint and feather the edges into the drywall.
Third / Final Coat
Apply a thin final coat using a wider finishing knife. Extend and feather the compound again to create a gradual transition between the joint and the surrounding drywall.
Sand the Finished Drywall
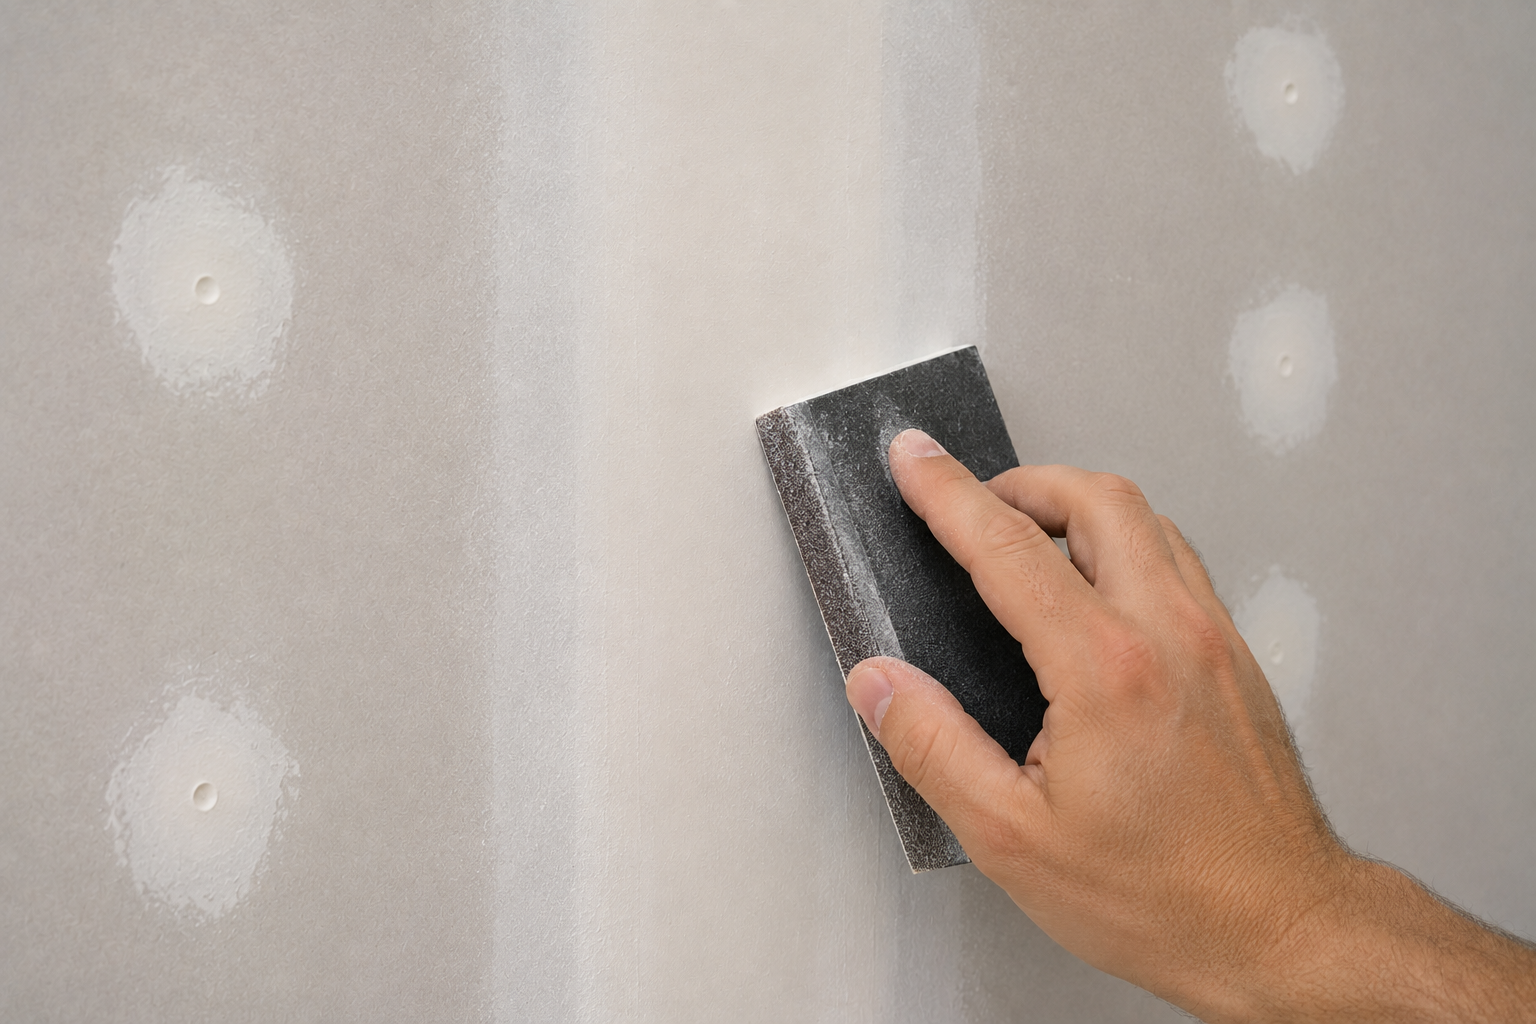
After the final coat has completely dried, sand the finished areas until the transitions between the joint compound and drywall are smooth.
Approximately 150-grit drywall sanding material works well for general smoothing.
For a finer final pass, approximately 180–220 grit can be used.
Use light pressure and be careful not to expose the tape or damage the drywall face paper.
Drywall Is Ready for Primer
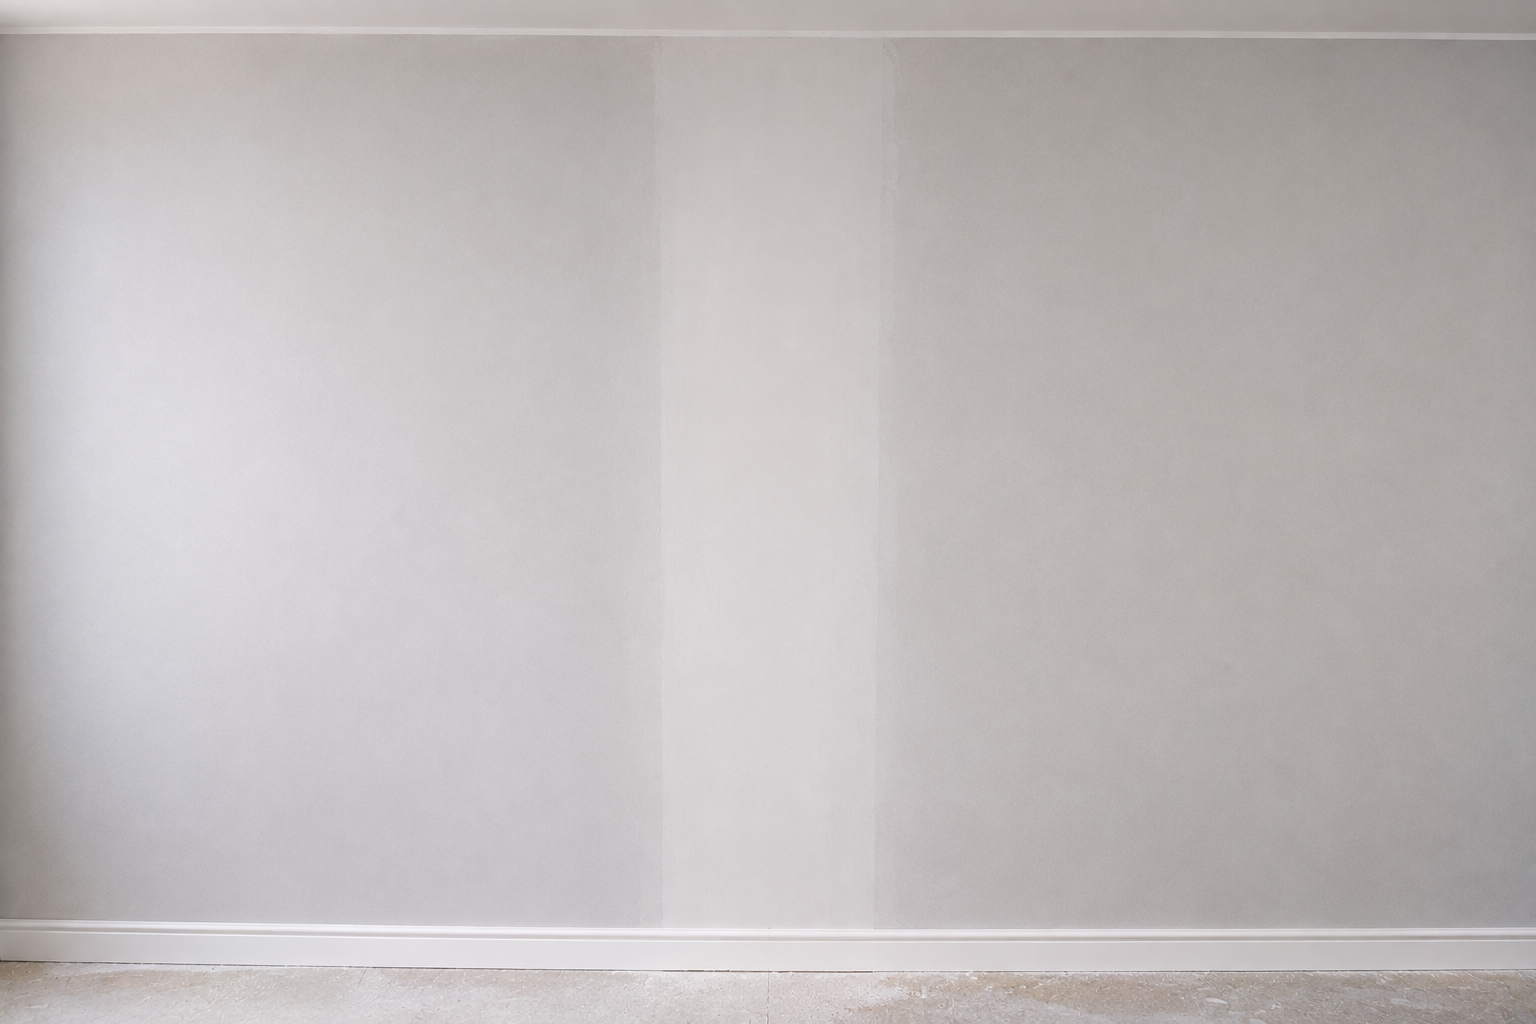
Once all joints and screw heads are smooth, inspect the wall carefully and remove the drywall dust.
The drywall is now ready for drywall primer.
Primer is important because bare drywall paper and joint compound absorb paint differently. Priming helps create a more uniform surface before the finish paint is applied.
After the primer dries, inspect the wall again. Primer can make small imperfections easier to see, allowing them to be corrected before the final paint coats are applied.
Toronto & GTA
Need Help With Drywall Installation or Repair?
Toronto Handyman provides drywall installation, drywall repair, patching, taping, finishing, sanding, and preparation for painting throughout Toronto and the GTA.
GET A QUOTE